There were three types of beams that we could choose from: an I-beam, H-beam, or a hollow box beam. There were also three parameters to the design: the weight, cost, and the deflection of the beam. The deflection and weight was easy. These could be found using the calculator from the previous page. The cost was different. How the cost was determined was be setting a cubic inch to $0.20 and each glue joint to $0.50. The cost could not exceed $9.00. The cost of the material was easy to determine as the volume was already in cubic inches. Now that the parameters are out of the way, designing was next. The design that was built is an I-beam.
The first thing to do was to see what type of wood was available. The store that the wood was purchased from was Hobby Lobby. Here is a picture of their wood rack:
 |
| Basswood and Bala Wood Selection |
 |
| Basswood Selection |
These are the sheets of basswood. It comes in 3 or 4 inches wide by 24 inches long pieces. The outside dimensions of the beam needed to be 2 x 2 inches while weighing under 200 grams. The The wood also came in a variety of thicknesses, mainly 1/8, 3/16, and 1/4 inches. The final choice was three sheets of 3/16 x 4 x 24 inch basswood. The two main choices were the 1/4 or 3/16 inch thick pieces. The wood needed to be sturdy, but cost effective. The 1/4 inch piece was $4.79 while the 3/16 inch piece was $3.79. With cost and sturdiness in mind, the 3/16 inch was chosen for this project. Three pieces of wood were bought in case of a miss-cut.
The next task was to design the beam. Once again, it need to be 24 inches long, and 2 inches square. The thickness of the wood was 3/16". There were two flanges and one web. The web need to be 2" minus the flanges, so the web height is 1-5/8".
Now that the design was finalized, the biggest issue was how to cut the wood. A saw is a logical choice, but a saw has a kerf. A kerf is the amount of material removed by the saw when cutting. The boards were 4 inches wide and there was no spare material. The next option was a knife as it does not remove any material when cutting. Basswood is relatively soft and cuts readily with a knife. Here is my set up:
 |
| Setup for first cut |
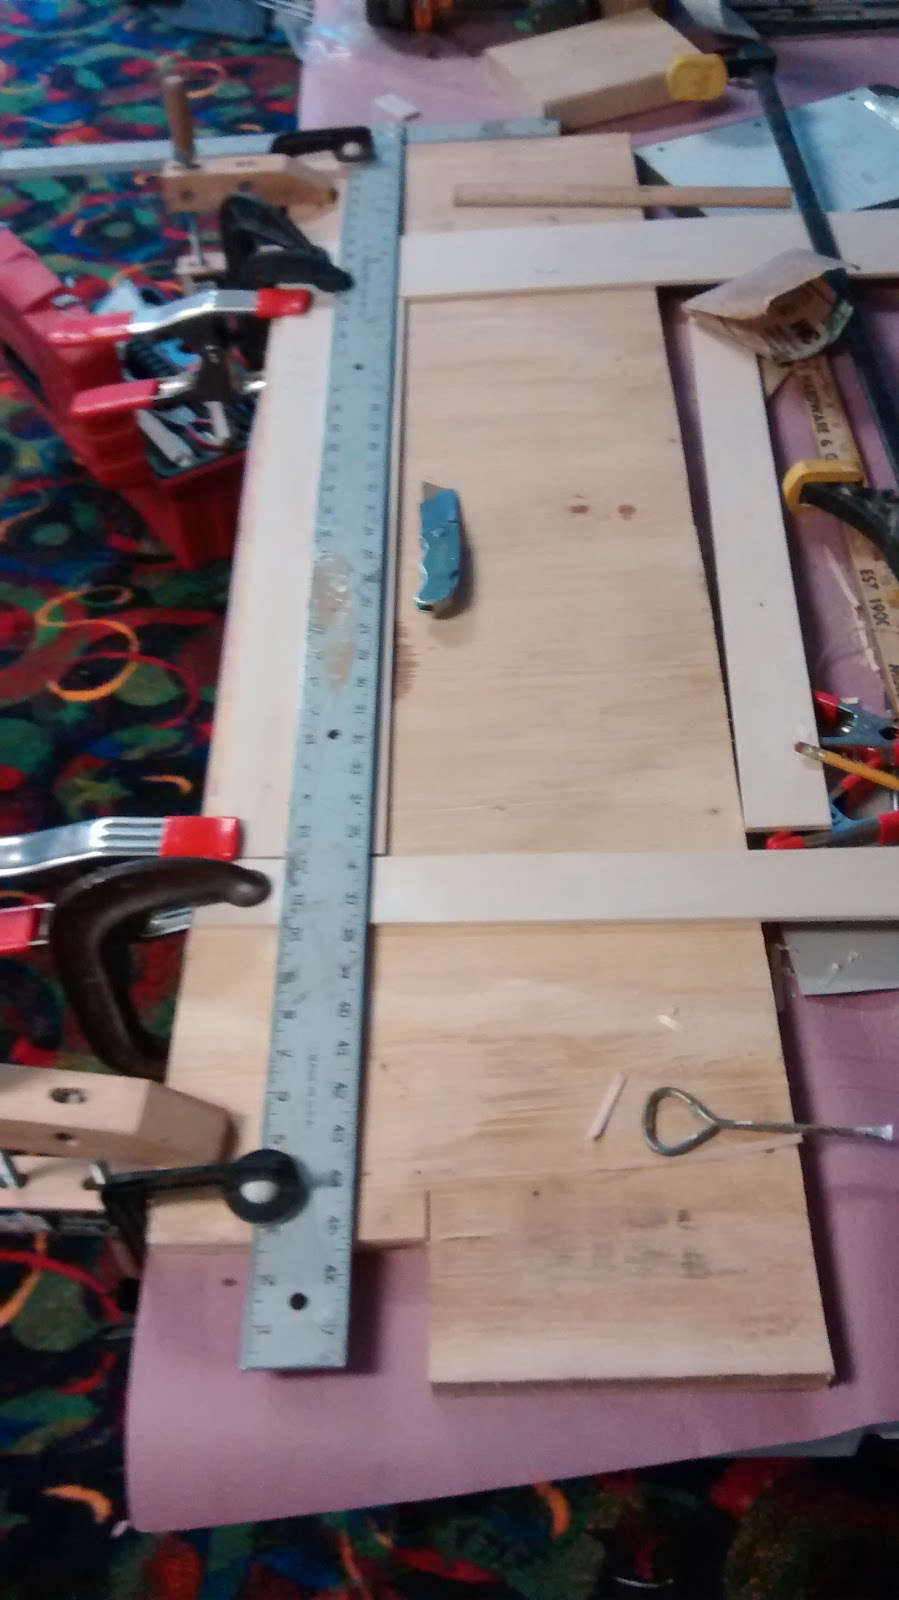
I was able to use a large framing square. It is made out of steel and has straight edges. There is heavy duty construction paper on top of the table and a piece of plywood on top of that. The center was marked, 2 inches, on the piece of basswood. The wood was then clamped to the plywood and the square was lined up with the center line. There are two spare pieces of wood the same thickness on either side of the wood. This gave more support to the square. The square was also clamped to the table. Once every thing was square and clamped down it was time to cut. The knife that was used was a basic utility knife with a disposable blade. It is sturdy and does not rattle or shake at all, as that would effect the cut.
The flanges were cut in several light passes while the blade was forced against the square. The blade did follow the grain of the wood and the cut was not perfectly straight or square. The edges came out slightly wavy and were then scraped and sanded smooth. The pieces came out to ≈ 1 15/16" because the blade followed the wood grain and had to be sanded and scraped smooth. However, these dimensions were close enough for this project. The same process was repeated for the web, but the piece was 1-5/8" wide. Here is another angle of the set up:
 |
| Side view of cut setup |
The next step was gluing. The glue used was a Elmer's Wood Glue as this glue was on hand. The glue could have been a stronger variety, such as Gorilla Glue. However, standard wood glue is surprisingly strong. The wood itself will often break before the glue breaks or lets go. The center line was marked on the flanges, approximately 1 inch. Then a vertical center mark was made on both end of the flange. The lines were lined up and then the two boards were clamped together. This was a dry run for the glue up and lines were traced along the web. I then glued together one flange and the web. The apparatus used to spread the glue was an advanced one, my finger. This often works better than a tooth pick because you can better control pressure while spreading.
I then repeated the some process once the glue had cured, approximately eight hours. I did another dry run by clamping the second flange onto the plywood and then T-shaped piece was clamped on top. The outline of the web was then marked on the flange. The T-shape and the last flange were glued together as seen below:
 |
| Front view of final glue up |
Here is a view of the beam from the side while being glued up:
 |
| End of beam |
Here is the finished beam:
 |
| Side view |
 |
| Top view |
The two hardest part about the build project was picking out what type of wood and then cutting it. If the project could be done over again, I would probably just use a table saw. It would make cleaner, straighter cuts and would be faster. There would have been two boards still used, but more waste. However, almost anyone can access a utility knife, clamps, and a straight piece of wood. I could have also used a stronger glue, but wood glue is readily available in a variety of stores and it was on hand.
Referring back to the parameters at the beginning of the page, the cost came out to $7.53. This was $1.47 under budget. There were two glue joints and the total volume was 32.625 in^3. To find the cost, the volume was multiplied by $0.20 per cubic inch. The cost of material came out to $6.525, rounded up to $6.53. The two glue joints added another $1.00, so $7.53.
To reiterate: this was another fun project, though tedious and time consuming. I did use only two of the three pieces of wood, so the actual cost was far under budget. As stated before, I should have used a table saw and maybe a stronger glue. Other than those two changes, I would not change anything, but we shall see how the testing goes.
No comments:
Post a Comment