 |
| Assembled Smart Coffee Pot |
This project was made to solve the problem of coffee after work or school. Often when one leaves work or school a cup of coffee is quite enjoyable. Instead of stopping at a coffee shop and spending $2 - $3 on a single cup, there could be a fresh pot of coffee waiting for you at home. A pot of coffee can cost 50 cents. This will save you a good deal of money and time after a few weeks of use. All that is required is to pre-load the coffee grounds and water into the pot as normal. Then turn of the power switch and walk away.
Here is how the Smart Coffee Pot was built and designed:
The first issue was the design. Our team met after the project was assigned and decided on a prototype design. The prototype would involve a relay, power cord, a standard wall outlet, and a coffee pot. We wanted the final design to be neat, simple, and user friendly. The coffee pot was the first component needed. We were not too picky at this point, we thought that another coffee pot would be used for the final model. The coffee pot was purchased used from Good Will for $5. The same one can be had from Amazon for $30 or $19 with Prime.
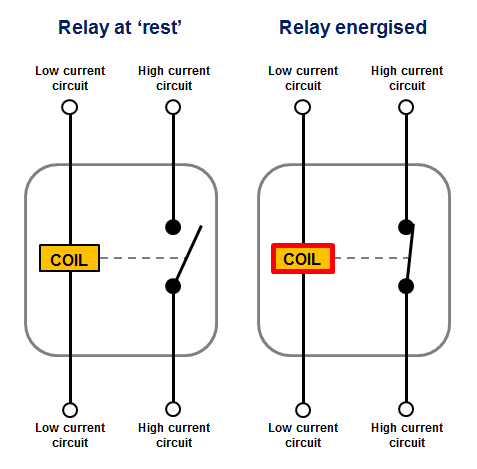
Once the coffee pot was purchased, the circuit could be designed. It had to supply power to the coffee pot. This was accomplished by using a power outlet. The power could be switched off or on by a relay or a manual switch. A relay is simply an electronically activated switch. It uses a electric coil to pull a piece of metal towards to close the circuit.
 |
| Photo Source: http://www.12voltplanet.co.uk/ |
A relay was included with the SparkFun inventor's kit that was purchased earlier in the semester. This relay is a SPDT relay while the diagram above shows a SPST relay. The major difference is that a SPDT relay has another terminal. This terminal is the default or 'preferred' one, the switch is resting on that terminal.
Wiring the relay was simple, a current needs to run through the bottom two leads. It needs at least 5v DC to activate. The data sheet for this particulate relay can be found here. This was done by soldering a pin cable to each terminal and then two gator clips were attached to a 9v battery. The AC power was wired to the top terminals. A multi meter was used to find the 'preferred' terminal and the AC power was wired to the other one.
Here is a picture of the relay wired up:

Here is a video explaining the prototype circuit:
Once the prototype was finished, the final designing could commence. The components had to be chosen. The two parts that still had to be purchased were the WiFi module and the DC power supply. Both of these were bought off of Amazon. The power supply was $5 and the WiFi chip was $6. However, a second module was purchased because the first one did not work. The power supply was removed from the casing to reduce bulk. The 'power on' LED was re-soldered with longer leads and male headers. Female headers were soldered to the board. This reason will be apparent later. Here is the power supply:
Once all of the components were in, a water resistant housing had to be designed. The housing would be mounted to the coffee pot and hold the arduino and other components. The housing was a crucial because the coffee pot would be in a kitchen. There was a chance that water could be splashed onto the circuit and cause a short cirucit. The design was started be placing the arduino board and the power supply board onto a piece of graph paper. The coffee pot was five inches wide, so the housing had to match that width. Conveniantly, the arduin and power supply board took up five inches with an ≈3/8 inch gap in between.
The coffee pot does have a slight curvature, so the bracket to hold the housing onto the coffee pot had to match that curve. This was accomplished by tracing the back of the coffee pot and measuring the distance between the center line and curve. As it turned out, this was fairly accurate. Once the dimensions were in hand, the housing could be designed in 3D. The software used to design the housing was Creo, which has been discussed on this blog before. 1/4 inch walls were used, which added 1/2 inch to the width . The final dimensions of the box are as follows:
The bracket was designed as a separate piece. The curve was plotted with points and then connected by lines. Then 1/4" was added to either side. The overall length was 5.5" while the depth was 1.375". This sketch was then extruded to be 5.5" tall. All of the outside corners have a 1/8' round. Here is he printed bracket:
 |
| Power supply board in the housing. Female headers on the left. |
Once all of the components were in, a water resistant housing had to be designed. The housing would be mounted to the coffee pot and hold the arduino and other components. The housing was a crucial because the coffee pot would be in a kitchen. There was a chance that water could be splashed onto the circuit and cause a short cirucit. The design was started be placing the arduino board and the power supply board onto a piece of graph paper. The coffee pot was five inches wide, so the housing had to match that width. Conveniantly, the arduin and power supply board took up five inches with an ≈3/8 inch gap in between.
The coffee pot does have a slight curvature, so the bracket to hold the housing onto the coffee pot had to match that curve. This was accomplished by tracing the back of the coffee pot and measuring the distance between the center line and curve. As it turned out, this was fairly accurate. Once the dimensions were in hand, the housing could be designed in 3D. The software used to design the housing was Creo, which has been discussed on this blog before. 1/4 inch walls were used, which added 1/2 inch to the width . The final dimensions of the box are as follows:
- Inside dimensions:
- Width: 5"
- Depth: 2.75"
- Height: 1.5
- Outside dimensions:
- Add 1/2" to width and depth
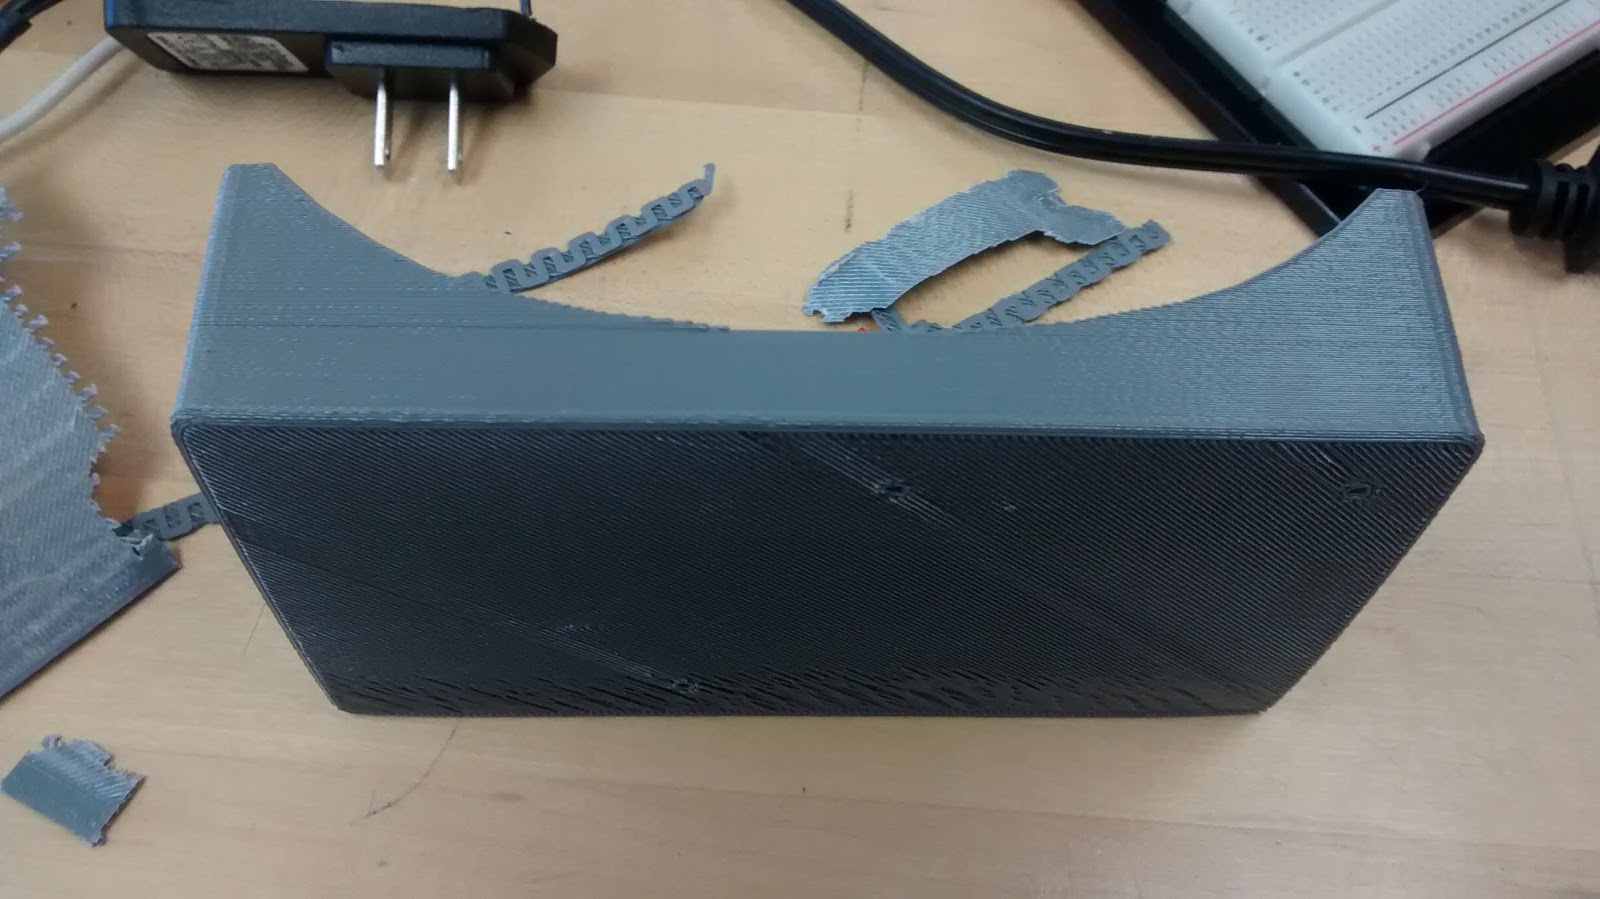
 |
| Printed box |
 |
| Printed Bracket |
The lid for the box was designed in Inkscape and cut in acrylic using the laser cutter. Five holes were cut into the lid, one for the switch, two for the LEDs, and two for the screws for it to be mounted. Several test pieces were cut with cardboard as the supply of acrylic was running low. Here is the final lid mounted onto the box:
 |
| Acrylic box lid. The mounting brackets can be seen. |
The next challenge was connecting the parts. I decided to use screws so that it could be disassembled if needed. Three tabs were modeled onto the box with 1/8" holes. Three matching holes were made on the flat side of the bracket. There were two self tapping screws included with the Inventor's kit. The holes were sized for these. The parts were assembled in Creo with the assembly tool. This ensured proper alignment of the holes. The screws that were actually used are #4 x 1/2" sheet metal screws purchased from Lowe's.
 |
| #4 x 1/2" sheet metal screws, x5 |
Here is the packaging:
The screws were $1.30 for five, which was all I needed. The box was then screwed together.
Once the housing had been designed, the arduino had to be mounted. This was done by designing a board mount. An arduino is too pricey to simply glue down. Again, Inkscape was used to design the mount. The screw holes were laid out to match the mounting holes on the arduino board. Five larger holes were cut in an 'X' pattern for the glue to adhere to. The arduino was mounted to the board with the self-tapping screws included with the kit. The mount was then glued to the inside of the box.
Now that the housing was completed, the circuit had to be assembled. This was fairly simple and quite similar to the prototype. A relay was wired to a transistor and 5v DC. The circuit can be found in the SIK guide on page 71 or 69. The LED part was discarded in favor of the LED being it's own circuit. It was also were AC power had to be connected. A diode was also added to prevent a EMF back flow. Here is the circuit on a breadboard:
Now that the circuit was design, it had to be assembled. A circuit board could have been used, but I prefer to simply wire everything together. I work better with linear ideas and wiring everything together is more linear. The power for the LED and relay were wired together. Pin leads were wired to the transistor and LED. A servo also had to be included as a moving part.
 |
| #4 x 1/2" sheet metal screws. Five per pack |
Once the housing had been designed, the arduino had to be mounted. This was done by designing a board mount. An arduino is too pricey to simply glue down. Again, Inkscape was used to design the mount. The screw holes were laid out to match the mounting holes on the arduino board. Five larger holes were cut in an 'X' pattern for the glue to adhere to. The arduino was mounted to the board with the self-tapping screws included with the kit. The mount was then glued to the inside of the box.
 |
| Arduino mount mounted onto the bracket. Notice the mounting holes |
 |
| Circuit laid out. The LED is on the left. |
 |
| Relay wired up. |
Now that the circuit was design, it had to be assembled. A circuit board could have been used, but I prefer to simply wire everything together. I work better with linear ideas and wiring everything together is more linear. The power for the LED and relay were wired together. Pin leads were wired to the transistor and LED. A servo also had to be included as a moving part.